| Hello there, Welcome to my Texturing tutorial.
In This one I will be texturing the head of the character I made
in my modeling tutorial. |
| Now I will be working in Photoshop, I should
first say that for a good texture, you need a good UV map with
a minimum amount of stretching. |
| In my last tutorial I went though how I set
up my uv's. Now it's not very in depth, so i'll provide a few links
to some other uv tutorials. |
| Chris Kniffen has written a good one
for maya users Link. |
| And here's a link to a good uv mapping
thread on cg
talk. |
| Leigh van der Byl has written a lot
of good information on texturing and what different maps are
used for. It's very well written: |
| Texturing
Workshop Part 1 |
| Texturing
Workshop Part 2 & 3 |
| Texturing
Workshop Part 4 |
| Texturing
Workshop Part 5 |
| Ok that's some useful links for you, now
I can make a start. |
 |
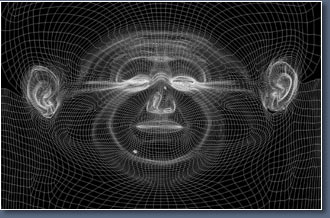
Here is a picture
of the UV Map for my head. which I shall be using as
a guide for painting.
|
|
I will be working
in a texture size of 3000 by 3000.
|
|
If your just
learning and practicing you do not really need to go
this big, a texture size of 1000 by 1000 or 1500 by
1500 will be just fine there's just no need putting
in extra detail when its not needed.
|
|
| I'm using texture size of 3000 because
of one that's probably the limit of the memory I have for my
PC also I plan to do some large renders of the head and 3000 by
3000 should be fine. |
| Now I'm not really, going to go into
great detail of what each map does, please read the above texturing
links by Leigh she can explain them far better then i can. |
| The maps I will be making for my head will
be: |
| Color Map |
| Bump Map |
| Spec Map |
| Reflectivity Map |
| Transparency Map |
| Translucence Map |
| Diffuse Map |
| Some of these maps I just use as part of
my shader, please remember you don't actually need to make all these
maps, this is just what I use. |
| I will be starting with the bump map
because its usually the base for the other maps, now if your
have Graphics tablet your probably find adding nice bump details far
easier, then using a mouse. I only have a mouse so it's not so
easy painting nice bump details and can take a lot of time,
but we'll make it;-). |
| Now lets load up photoshop and make
a start. |
| This tutorial is aimed at beginners
so the bump map won't actually involve to much painting. |
 |
I've thought
up a few ways to make it easier to make a bump map,
it won't be the best, but it should be quite easy to
make and follow if you have Maya that is.
|
|
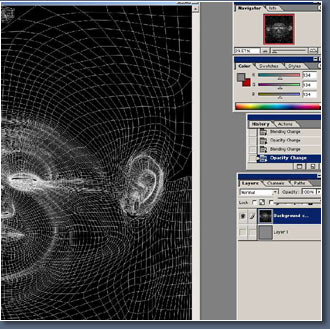
Lets first
load the UV map into photoshop.
|
|
 |
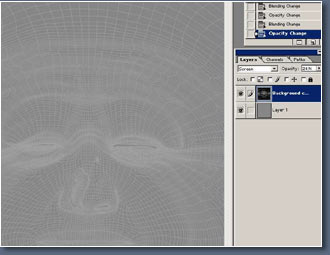
I've made a gray 50% gray
layer, below the uv map layer.
|
|
Now i've screened
the uv map over the gray layer and turned down the opacity.
|
|
 |
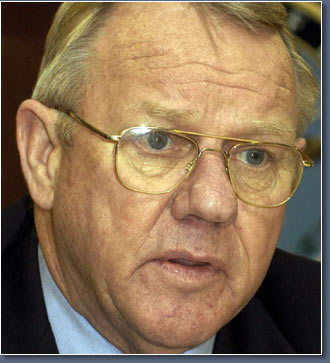
I should just
say you always need good reference for making textures,
here is the picture i'm using for reference, i'm not
going for a nice clean skin texture, quite the opposite.
|
|
 |
Now usually
I would start painting the bump details and it can be
hard some times to make a start. But for this tutorial
I'll be using some of Maya's Procedural textures as
a base for our bump layer.
|
|
So let's load
up maya and experiment with some of maya's Procedural
textures, it's always good to experiment and try different
things.
|
|
Now using the
IPR Interactive renderer, i've played about with different
textures and settings looking for different parts of
the skin.
|
|
 |
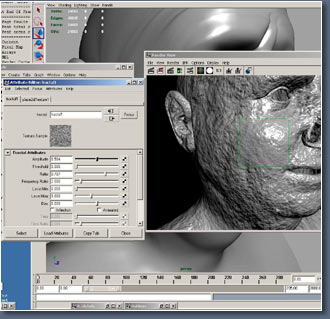
I've pluged
a fractal texture and started playing about with the
settings.
|
|
 |
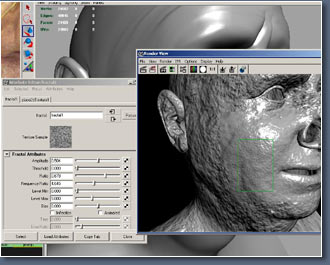
I've tweaked
the settings till I found something that I liked, once
I'm happy I converted it to a file texture that I can
use in photoshop.
|
|
 |
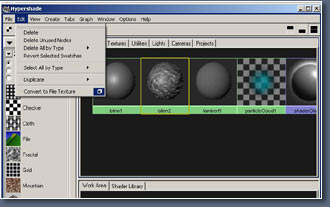
From the menu
shown above I first selected the head mesh then shift
selected the shader, then select convert to file texture
from the menu.
|
|
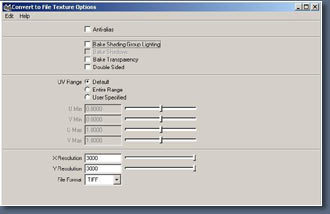
Here's the
options i've selected texture size 3000 by 3000 because
that's what i'm using of course and I selected TIFF
format to keep all the details.
|
|
 |
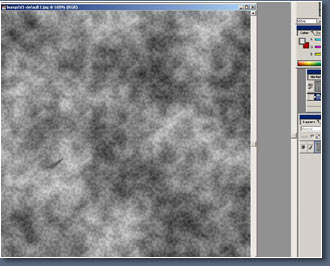
Once Maya has
written the texture image i open it in photoshop and
paste into my photoshop file .
Now
let's see what else we can use...
|
|
| |
|
|
