| |
Character Rigging In Maya
The
Spine
Right, let's continue
the skeleton setup with the spine. Maximise your side
view and create the following joints : -

Now, open up the
Outliner, and rename the joints starting from the bottom up
like this : -
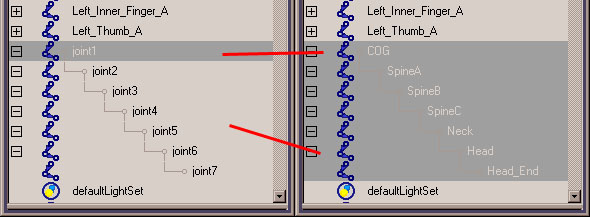
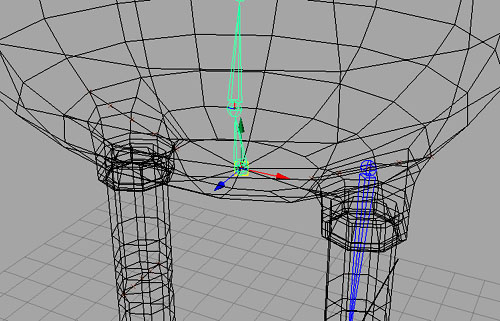
Ok, now we need to
move them into place. Within the Outliner, select the
COG (I've called it COG, as this stands for Centre
Of Gravity), and move it into place, so that it
sits as best as you can get around the middle of the character
using the side view, to make things a little easier, turn the
character layer to R - Reference, and in the Persp
view, snap to this point within the middle of the
character : -
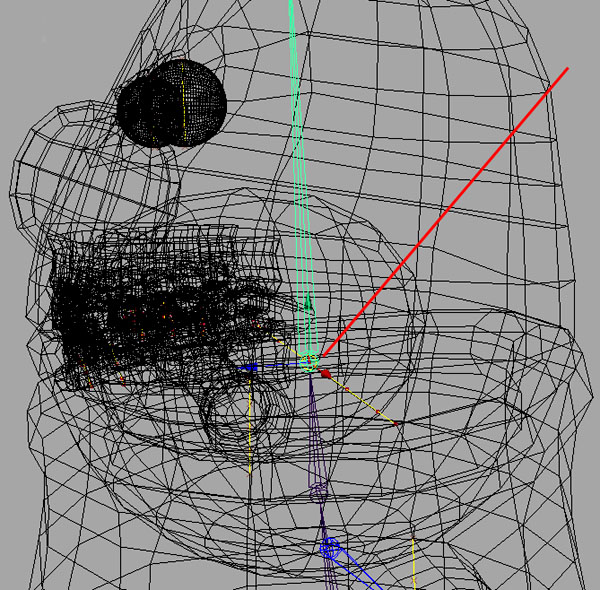
Now select the Head
joint, and snap it to the middle CV of the nurbs guide curve
which lies in the head area : -
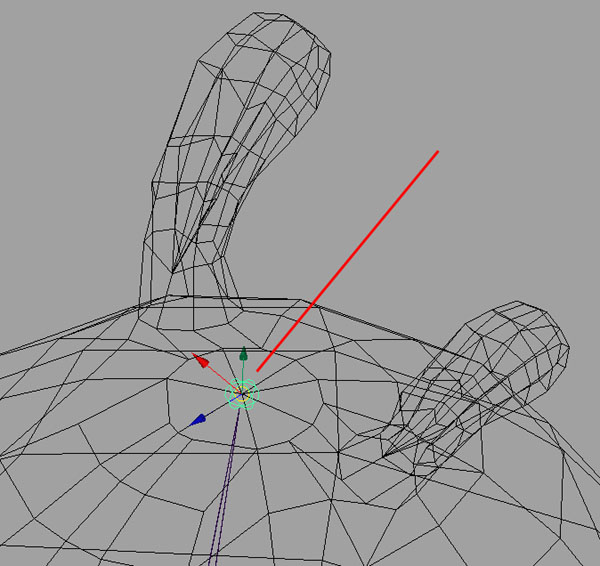
And finally, select
the Head_End joint, and snap to the middle vertex on
the top of the character model, once you've done this, you can
change the character layer back to T - Template, and
again, once you've done that select the COG Joint and
add the whole set of joints to the Skeleton_L Layer :
-
Ok, let's go back to
another part of the skeleton, within the Outliner, select the
Left_Clavicle joint, and the Channel Box, in the
Translate Z box, type 1 and press Return, now
with the Left_Clavicle still selected, press the down
arrow key on the keyboard, it should now jump down the next
bone in the hierarchy, the Left_Shoulder joint, now
snap that joint back to the middle CV of the nurbs guide
curve, basically your snapping it back to the location it was
at before we moved the Left_Clavicle joint. Now,
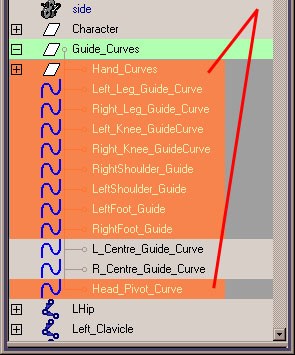
we've finished with our Guide Curves for the main body
now, so open the Outliner and select the following curves
within the Guide_Curves group and delete them,
once you've done that, you should be left only with the guide
curves for the eyes which we will be utilising later. :
-
Right. moving on, if
you haven't already done so, template the character and
guide_curves layers, so that we can concentrate on the joints
only. We're now going to set up the rest of the leg
joints, in the side view, we need to create some more joints
that will aid us in the reverse foot setup that we will be
producing, so, in the side view, set up your joints like this,
use Grid Snapping, it doesn't matter about the placement as we
will be moving them into place later, press Enter when your
done : -
Within the Outliner, rename
the joints like this : -

Select the
LReverse_Foot joint, add it to the Skeleton_L
Layer, now we'll move it into place, turn off grid snapping,
and instead, in the Persp view, vertex snap the LReverse_Foot
joint to the Ankle joint like this : -

With the
LReverse_Foot still selected, go into the Channel
Editor and within the Translate Y box, change the value
to 0, this will make sure our LReverse_Foot
setup lies on the ground origin. Now, select each joint
and snap to the corresponding joint, i.e. LReverse_Toe
Snapped to LToe and so on : -

Before we move onto the next
part, the actual rigging process, we'll need to do one more
thing with all of our joints, and that is to
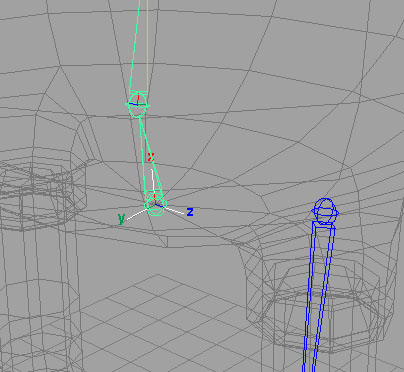
orient them. Ok, open the Outliner and
select your COG joint, now select from the menu,
DISPLAY > COMPONENT DISPLAY > LOCAL ROTATION
AXES, you should now get something like this : -
continue on until you have
done the same for all joints, you will have to do this
manually 1 by 1, so just press G to repeat the last step for
each joint in turn when you select it, you will end up with
this :-
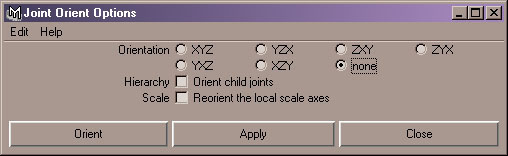
Now, select the
COG joint, from the menu select SKELETON > ORIENT
JOINT and open the options box, we want to make sure all
of our joints local rotation axes all point in the same
direction, for the COG joint, set it to the following -
none, note the Y always points to
the next joint, switch off the Hierarchy and
Scale options : -
Now carry on and do
the same for all the other joints 1 by 1, basically, we're
resetting all the joints, so that we can now in turn set each
joint to what we want it to be orientated at, once you've done
that, you'll notice that all joint orients are the same and
all have Y as the Up axis. Now before we continue, we need to
download a melscript that will aid us in the orientation of
all of our joints, the script (By Jason Schleifer) we'll be
using is called jsOrientJointUI.Mel, and can be
downloaded from this address : -
http://homepage.mac.com/jschleifer/HomePage/melScripts.html
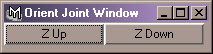
Ok, once you've downloaded
the script, put it in your usual scripts directory, and then
within Maya, type into the Command Line in the bottom
left, jsOrientJointUI; ,
hilight it, and then drag and drop it onto your shelf as shelf
item, now click on your latest shelf addition, you should get
a pop up menu like this : -
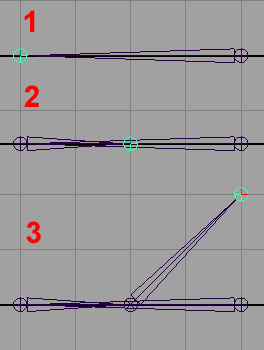
now go back to the
original COG joint and then press the down arrow key to
move up to the next joint in the hierarchy, you should have
the SpineA joint now selected, and select either Z Up
or Z Down, in the case of SpineA, Z Up should be the one you
will be using, carry on, until you have done all the joints in
that hierarchy, you should be getting results similar to this
diagram: -
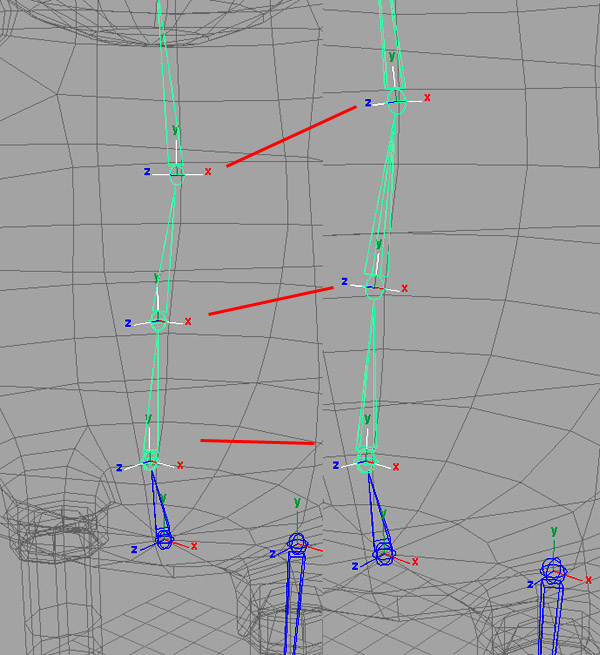
What you'll find is joints
slightly tilted in one direction (backover) will require Z Up
Orientation and joints tilted forward will require Z Down
Orientation. Note, don't worry about the end
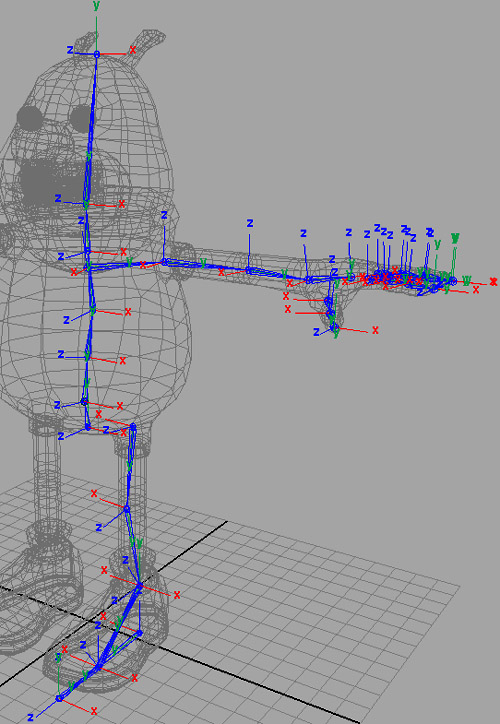
joints. Now do the same for the Leg joints, for the
first joint in the chain, you will probably use Z Up, now
carry on doing the same for the rest of the joints in the
legs, and also for the reverse foot joints. Now with the
reverse foot joints, select the first one, it can probably get
a bit confusing, so you should orient like this, 1st Joint, Z
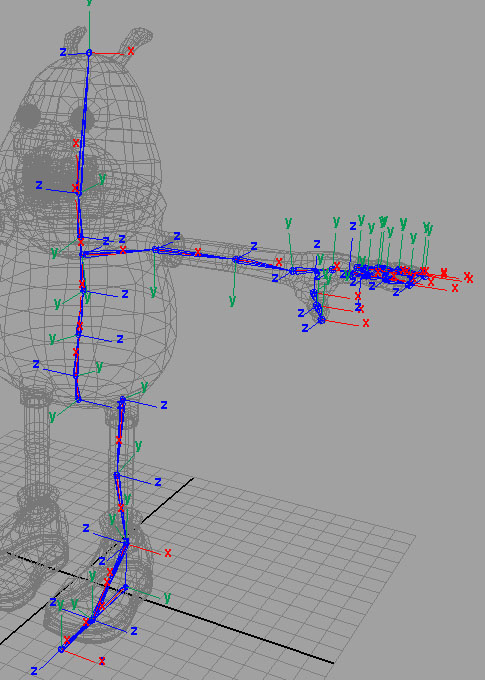
Up, all other joints, Z Down. Now moving onto the arm,
you'll utilise Z Up orientation all the way along, and again
for the fingers, Z Up too. With the Thumb Joints, you'll
again utilise the Z Up Orientation, now, once you've done,
you'll have something like this : -
As far as joint orientation
goes, that's it, and the whole reasoning behind doing this, is
to make sure all of our joints will rotate in the correct
direction that we require when animating. Now we're
going to parent some of our joints together : -
Character
Rigging Tutorial - Third Page
|
|
