| HOME DOWNLOADS TUTORIALS CONTACT |
|
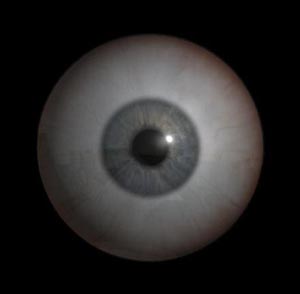
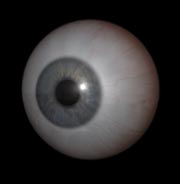
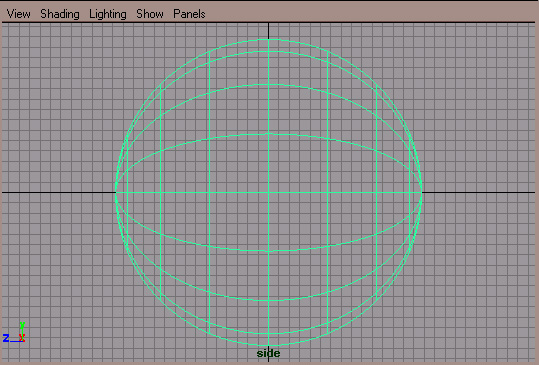
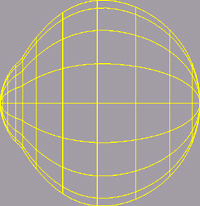
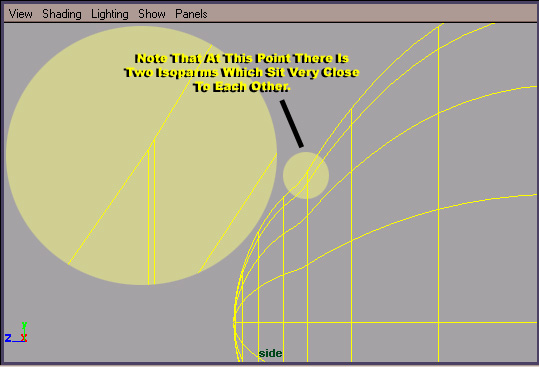
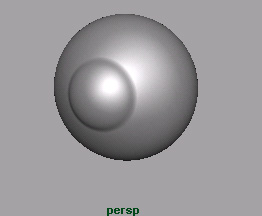
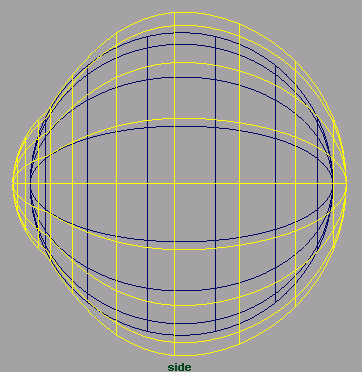
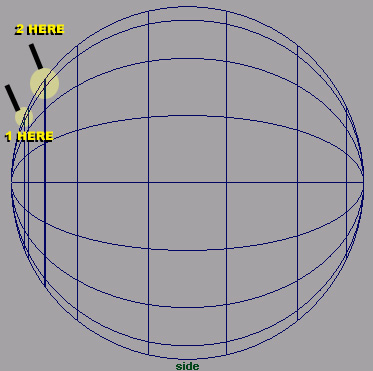
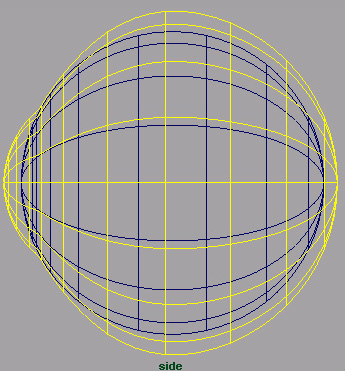
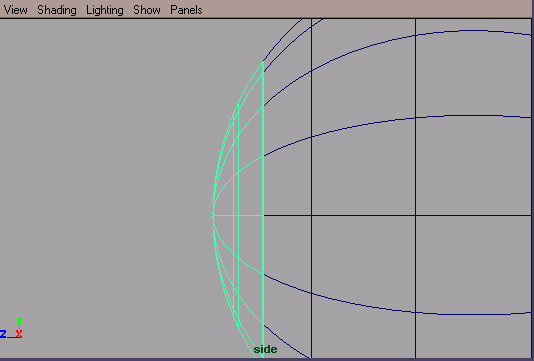
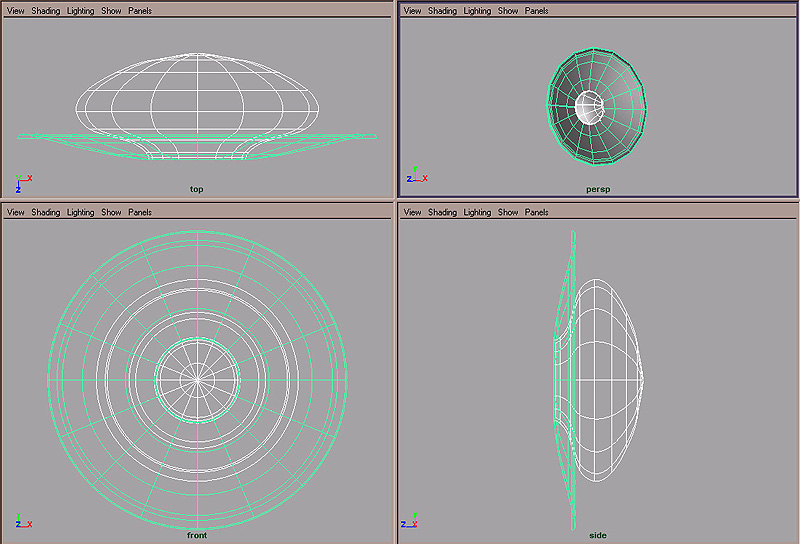
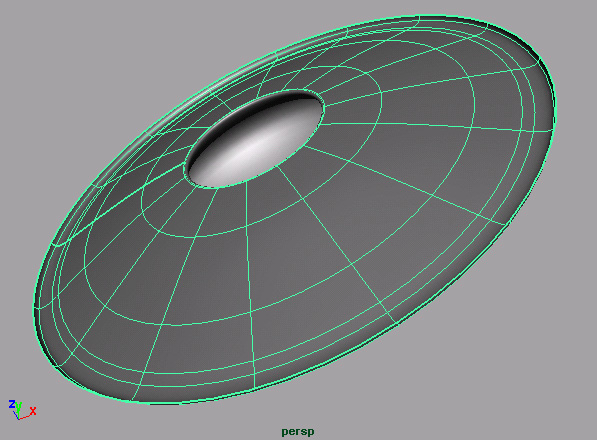
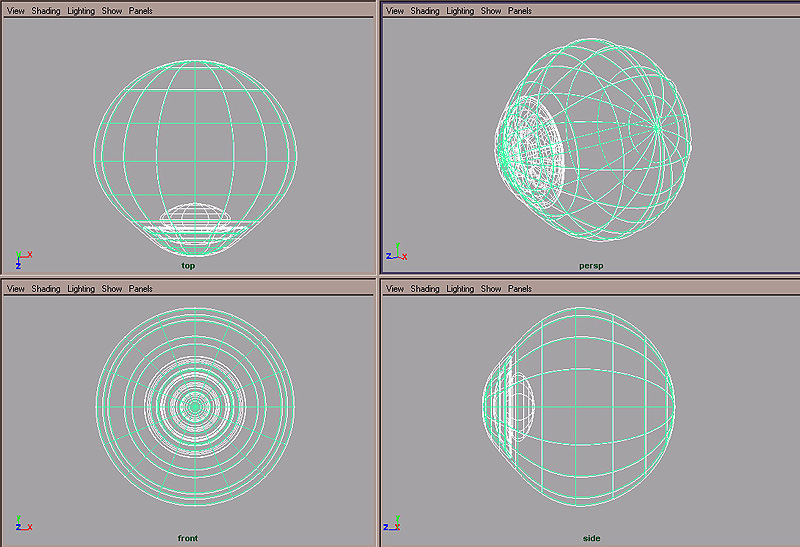
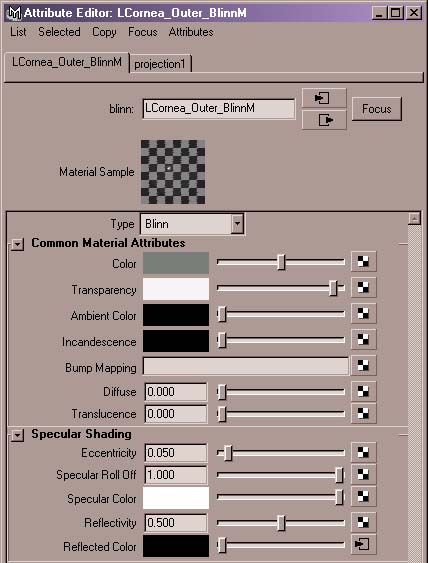
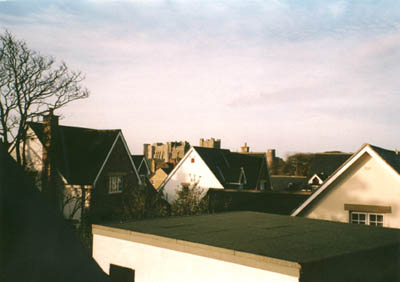
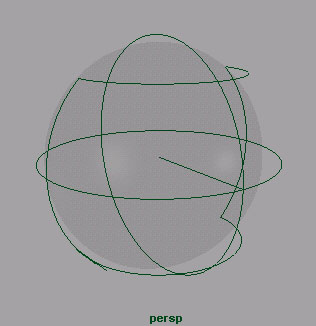
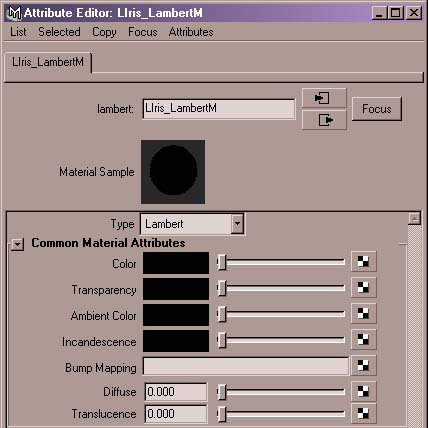
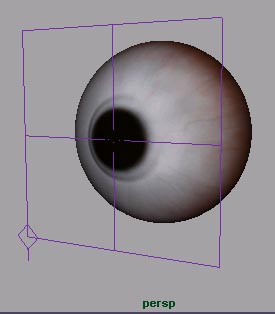
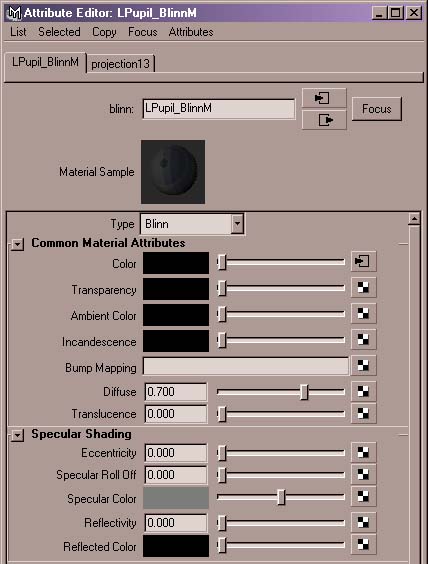
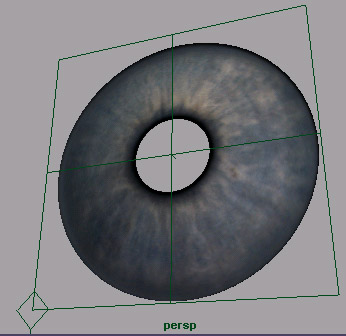
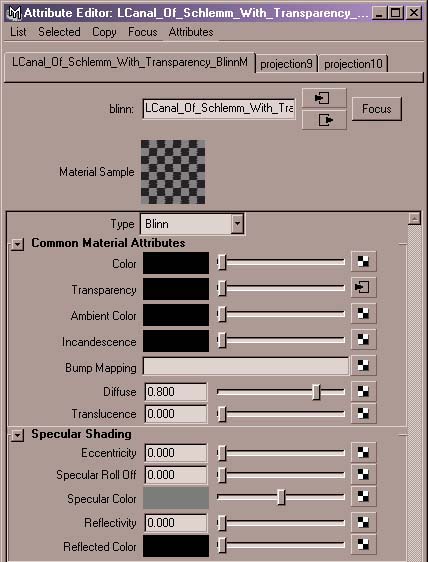
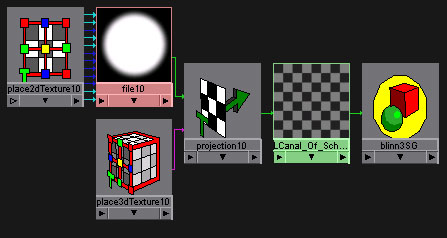
In this tutorial we will create a 3D Eye utilising Maya's Nurbs Technology. I will be showing you some extra tips and techniques that aren't usually shown when creating an eye, these tips will make sure that your images stand out better than anyone else's due to the 'thinking' behind them. I'm not going to bore you either with the exact workings of the eye, I'm simply going to show you how to model it with a lot of other information usually overlooked within other tutorials. OK, let's start, load Maya up. Create a NURBS Sphere and rotate it on the X Axis 90 degrees. Open up it's attributes within the Channel Box (look under makeNurbsSphere1) and increase it's Sections to 16 and it's Spans to 8, you should now have something like this (Side View shown only) : - Duplicate this and place it into another layer, we are going to use this later. Now we are going to create this shape, first download the zip file EYE MODEL OUTLINE (Zip File - 128kb) Open the zip file and place the image into your side view as an image plane, if you are unsure as to how to do this, see the Subdivision Ear tutorial. With this image present, start tweaking your model until it fit's the image plane exactly, you will also need to add extra isoparms for some parts, notice how the outline of the eye is not really spherical but slightly squashed. Making it this squashed - ala correct - shape will enable you to place the eyeball within your characters head even easier as it sits closer to the eyelids then a completely round eye. Also take note of the two isoparms that site tightly together as shown here: - Now make a duplicate and copy to a new layer. We will be using that one a bit later to create the outer cornea. If you've followed everything so far, you should have a shape that is similar to this right now in your perspective view : - If so great, I think it's probably about time you saved what you have so far, so save what you currently have and we'll now move onto the next part. Go into your other layer, and scale the duplicate you just made so that it is slightly bigger than the sclera part of the eye you just created, now start moving isoparms and removing some of them so you get a similar look to this next diagram :- Note that the Cornea (RED) is slightly larger at the front and does not take on the shape of the sclera as much in that area, once done, save again. Now onto the important parts, the iris, pupil and the canal of schlemm. What's that you may ask, well if you look in the mirror really closely at your eyes you will notice that their is a dark ring which runs around the pupil where it meets the sclera (white part of the eye) that is because the pupil does not actually meet up with the sclera but actually sit's behind it and is held there in what's know as the canal of schlemm (the dark ring), this is something we are actually going to model and so enhance the realism of the actual eye. First off, let's create the pupil : - Remember the first sphere you duplicated and placed into another layer earlier, we are now going to use that, scale it so it fit's within the sclera model (yellow) like this: - Notice that you'll want to keep it perfectly spherical this shape. Now add some isoparms as shown here :- Where it says two, it's as before, i.e. tightly together - If your wondering why I'm keeping them tightly here, it's because where going to be detaching the surface here further on. Right, duplcate and copy to a new layer, in that layer, detach the surface at the last isoparm where you placed 2 tightly together as shown here : - Keep what you have detached at the front and delete the rest, this will form the basis of our darkness layer (or canal), now go back into the previous layer, we are now going to shape the Pupil and Iris. Again, detach the surface at the same point as you did before and delete the area directly behind, now with this next part you want to scale isoparms, move isoparms and add isoparms, keep tweaking until you get this shape : - Notice that this is shown in two parts, this is because the inner surface is detached to create the iris. Also notice the curvature of the pupil, it goes up, in over and then back out over, you can see it better in this view : - Right, we've nearly finished, the iris is fairly simple, just make sure it looks fairly similar to the shape above, it doesn't have to be exact as it will surfaced to be completely black, make sure you detach it from the pupil, as that will be textures differently from the iris. Now bring it all together as shown in the last diagram (click to enlarge) , and then SAVE. Make sure you have named everything according to what it is, good naming conventions will help you later, simply call each bit after it's real world counterpart, you should have the following names - Cornea - Sclera - Canal - Pupil - Iris, anything else should not be there. If your happy with how far you are along now, we will now move onto the next important step, the actual surfacing and texturing. Ok, now we can move onto surfacing and texturing the eye, if you've followed part 1 of this tutorial, the modelling, you should have all your parts in seperate layers. First off, we shall start with the easiest parts first, the cornea and the iris. Select the Cornea object and hide all the other layers, the cornea should be transparent, but not fully, and we will be faking a reflection within the material, this is because I have done various test's within Maya's render pipeline involving the correct refraction and reflection values and I've gotten nothing but render artifacts when doing so, so I will be using this method, so surface your cornea using these values : - Ok, we want to map an image into the Reflected Colour node, so click the texture box next to it, and you want to use a projection map which is mapped spherically. For a good reflection, I would recommend using a contrasting image, something with a visible horizon line, I used this image :- When you have finished surfacing and texturing, your perspective view should look like this :- Ok, hide that and now select your Iris object, the iris is literally a hole within the eye, and should be textured as being jet black, no specular and no diffuse, I used a Lambert, so surface like this :- Ok, that's the two easiest parts done and dusted, now let's move onto a slightly more complicated surfacing process, we will now work on the Sclera (White Part Of The Eye). We will be mapping textures into the Colour, Transparency and Bump Channels respectively, so ignore those for now within the diagram. We have used a very low specular as we don't want it to interfere with the Cornea's specular hilight, which is the main feature hilight of the eye, anyway, back to surfacing, use these values : - Ok, you've set up you surface, now onto the textures, you will need to create three textures within photoshop, these are shown here as Colour/Bump and Transparency :- Map each one into it's required node, colour into the colour node, transparency into transparency node, etc. You will want to map each one as a projection utilising a planar mapping method, if done correctly, your perspective view should look like the one below, notice that the white overlaps onto the model's protrusion at the front, this, in conjunction with the transparency map, will give us a very nice transition, and allow us to see the objects underneath, mainly the iris, pupil, and canal (dark ring area) : - Take note of the transparency map being used, as we will be using that technique again later on in the tutorial to make a dark outer ring to the pupil. Speaking of the pupil, let's move onto that now, the pupil I have surfaced with no specular or reflectivity, as these would prove to be distracting within the final output, I utilised these values, notice I have only mapped into the colour channel, I used to previously map also into the bump channel, but the output wasn't really noticed, unless an extreme closeup was required, so we'll leave that for now, as we don't need anything else adding to the rendertime) :- The actual pupil texture map is mapped again as a planar projection to the front of the pupil object. I personally used a lot of reference when creating my pupil including my own eye as reference, to make sure your maps fit their 3d model equivalents perfectly, I'd recommend grabbing a screenshot (ALT+PRINTSCREEN) and using that as a template for drawing on within photoshop, as this proves to be the best reference, notice the black overlap I have used to gain a better transition to the jet black iris underneath the pupil model: - ok, now, last but not least, remember the canal object or darkness layer object you created, now we'll texture that, we don't want it to be specular in any way, and no reflections or anything else, it will be simply textured and surfaced to basically create the outer dark ring, and because it's mapped to the outward shape of the object, it really gives the eye depth and more realism, as everything seems to sit in place much more, first, surface like this : - Now, we want to create a transparency map within photoshop, remember to better fit your model, use a template for painting onto within photoshop, once you have your texture, map it into the transparency channel as a planar projection, the resultant shading network should look like this : - Now, we should bring everything together and do some test renders, the only tweaking you should have to do, should be within the last thing you textured, the dark ring, initially you will probably make the ring too dark, or too big, so manipulate your image within Photoshop until you are happy with the final results, in this final image, notice the dark ring giving the pupil depth. EYE MODEL DOWNLOAD ( 3.5 Meg )
|
|
|